From Kit to Masterpiece: Building Complex Scale Models in 2026
Advertisements
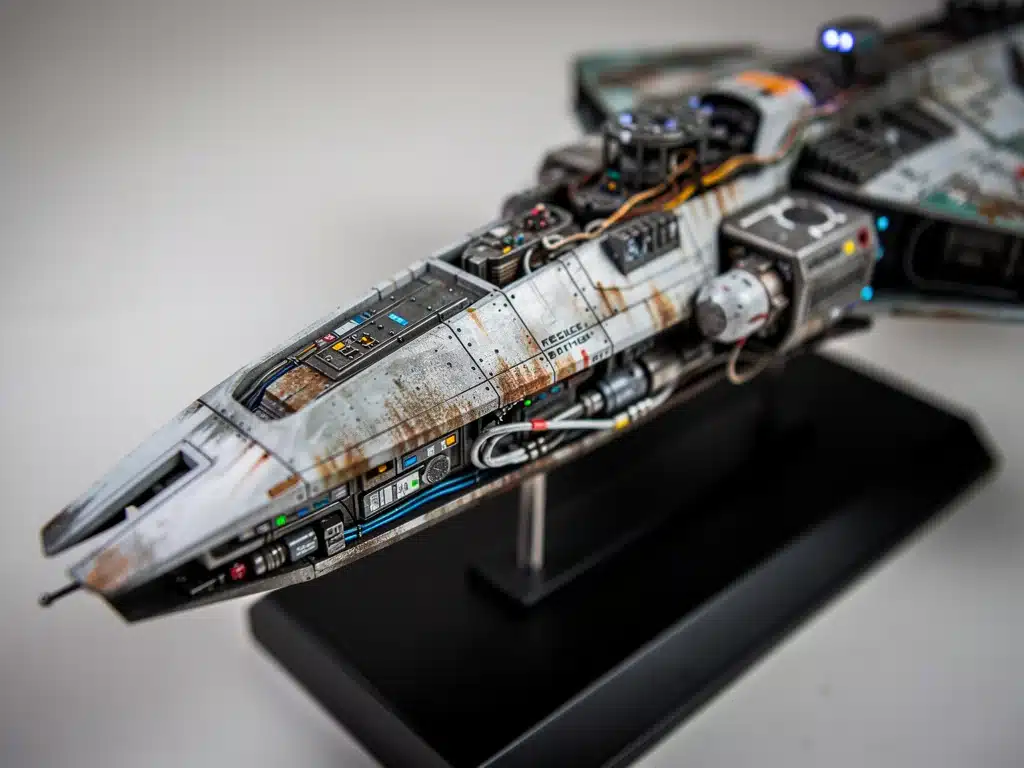
The journey from kit to masterpiece: a 7-step workflow for building complex scale models in 2026 involves an intricate process of planning, precision, and artistic vision, culminating in a highly detailed and museum-quality collectible.
Have you ever looked at a beautifully crafted scale model and wondered about the magic behind its creation? In 2026, the art of model building has evolved, offering enthusiasts unparalleled opportunities to transform intricate kits into breathtaking displays of craftsmanship. This guide unveils a comprehensive 7-step workflow for building complex scale models in 2026, designed to elevate your hobby from mere assembly to true artistry.
Advertisements
Understanding the Foundation: Choosing Your Complex Kit
Before any glue touches plastic, the first crucial step in building a complex scale model is selecting the right kit. This isn’t merely about picking something that looks appealing; it’s about evaluating the kit’s complexity, your skill level, and the availability of aftermarket parts and resources. In 2026, manufacturers are producing incredibly detailed kits, often with photo-etched parts, resin components, and digital instructions, pushing the boundaries of what’s possible in miniature.
For aspiring modelers tackling complex projects, understanding the kit’s scale and the subject matter is paramount. A 1/35 scale tank will present different challenges than a 1/72 scale aircraft or a 1/144 scale Gundam. Each scale dictates the level of detail you can achieve and the specific tools you’ll need. Furthermore, research into the real-world counterpart of your model can provide invaluable insights for accuracy and weathering.
Researching Kit Quality and Aftermarket Options
- Online Reviews: Consult forums, YouTube channels, and dedicated model-building websites for in-depth reviews of potential kits. Look for feedback on part fit, molding quality, and instruction clarity.
- Aftermarket Availability: Many complex kits benefit from additional detail sets. Research if photo-etch, resin, or metal parts are available to enhance realism.
- Community Support: A strong online community can offer guidance, tips, and inspiration throughout your build.
The foundation of any masterpiece lies in its beginning. A well-chosen kit not only sets the stage for a rewarding build but also provides the canvas upon which your skills will shine. Taking the time to research and select wisely ensures that your journey from kit to masterpiece begins on the right foot.
Strategic Planning and Preparation: The Blueprint for Success
Once your chosen kit arrives, resist the urge to immediately start snipping parts. Strategic planning and thorough preparation are the unsung heroes of complex scale modeling. This phase involves a deep dive into the instructions, understanding the build sequence, identifying potential pitfalls, and gathering all necessary tools and materials.
In 2026, digital instructions and augmented reality apps are becoming more common, offering interactive views and detailed step-by-step guidance. Leverage these technologies to visualize the build process, especially for intricate sub-assemblies. Consider creating a dedicated workspace with good lighting and ventilation, essential for handling paints, glues, and fine dust.
A crucial aspect of preparation is dry-fitting. Before applying any adhesive, test-fit components to ensure proper alignment and identify any areas requiring sanding, filling, or modification. This proactive approach saves countless headaches later in the build. Organize your parts by step or sub-assembly to maintain order and prevent loss of small pieces.
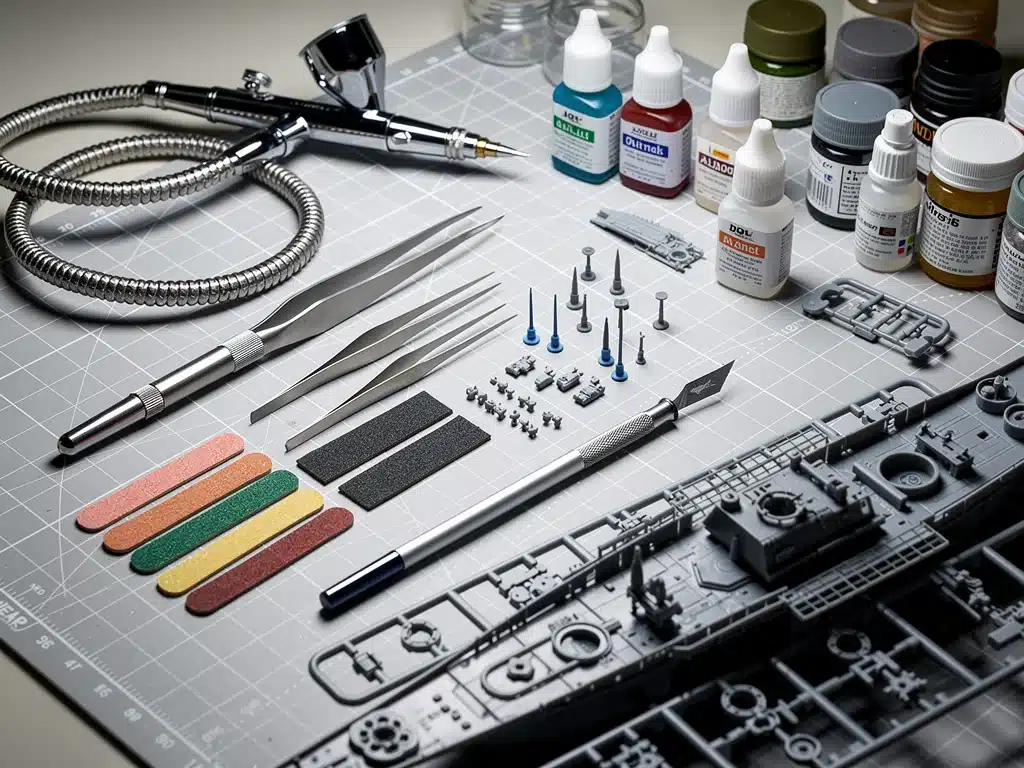
Essential Tools and Workspace Setup
- Precision Cutters and Knives: High-quality tools are indispensable for clean sprue removal and precise cuts.
- Sanding and Polishing Supplies: A range of sanding sticks, files, and polishing compounds for seam removal and surface preparation.
- Glues and Cements: Various types, including plastic cement, CA glue, and white glue, each suited for different materials and applications.
- Good Lighting and Magnification: Essential for seeing fine details and performing intricate work without eye strain.
Effective planning and meticulous preparation are not just steps; they are the bedrock upon which a successful and enjoyable complex model build is constructed. Investing time here will streamline subsequent stages, allowing for a smoother and more gratifying experience.
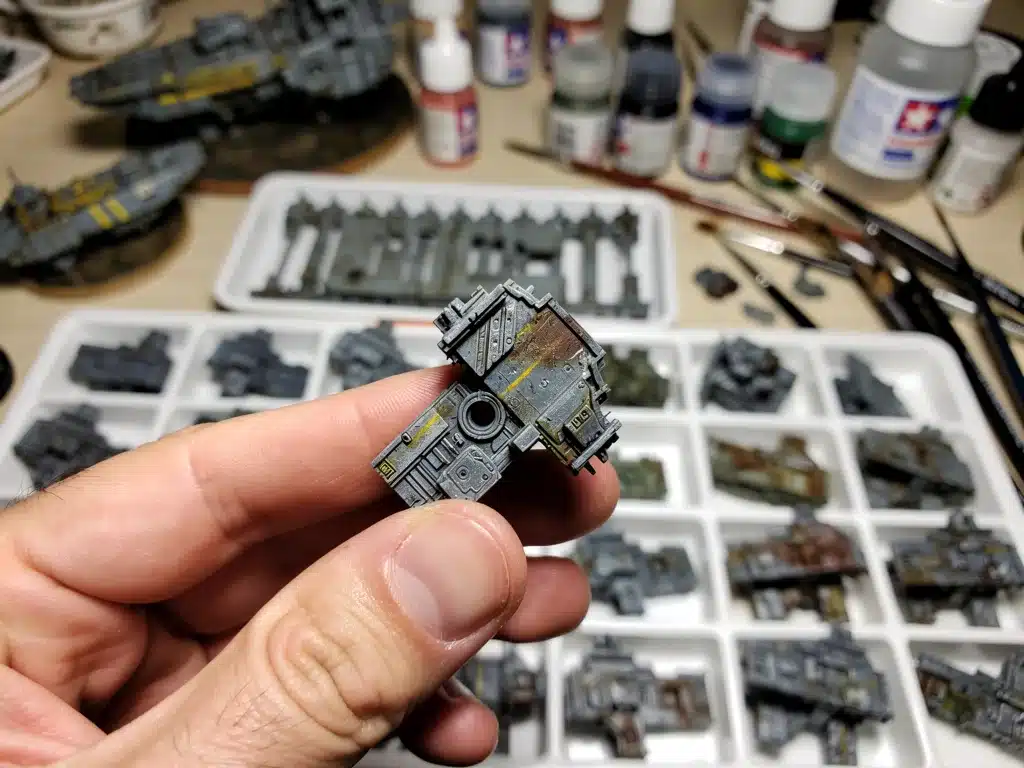
Precision Assembly: Bringing Components to Life
With planning complete, the assembly phase begins, demanding patience, precision, and an eye for detail. This is where the individual pieces of your kit start to coalesce into a recognizable form. For complex scale models, assembly often involves multiple sub-assemblies that are later brought together, requiring careful alignment and secure bonding.
The choice of adhesive is critical. Plastic cement is ideal for bonding styrene parts, creating a strong, almost molecular bond. For dissimilar materials like photo-etch or resin, cyanoacrylate (CA) glue or epoxy is often necessary. Always use glues sparingly to avoid unsightly residue and to maintain fine detail. Consider using accelerants for CA glue to speed up curing times, especially for delicate parts.
Seam lines are an inevitable part of model building, especially with complex kits. Addressing these early and effectively is key to a professional finish. After joining parts, allow sufficient drying time, then carefully sand down seams using progressively finer grits. For stubborn gaps, a thin layer of putty or surfacer can be applied and then sanded smooth. This meticulous attention to detail during assembly significantly impacts the final aesthetic.
Advanced Assembly Techniques
- Pin Vises for Drilling: Use a pin vise and tiny drill bits for adding detail, creating holes for wiring, or reinforcing joints with metal pins.
- Photo-Etch Bending Tools: Specialized tools like bending pliers or photo-etch folders are invaluable for shaping delicate metal parts precisely.
- Magnetizing Parts: For models with interchangeable options (e.g., weapon loadouts), consider using small rare-earth magnets for easy swapping without permanent attachment.
Precision assembly is where the model truly begins to take shape. Each carefully placed component and each seamlessly joined section contributes to the overall integrity and visual appeal of the finished piece. This stage is a testament to the modeler’s skill and dedication.
Painting and Detailing: The Art of Realism
Painting is arguably the most transformative step in building complex scale models, elevating a plastic assembly into a work of art. This stage involves a multi-layered approach, from priming to base coats, detail painting, and various weathering techniques. The goal is to achieve realism, bringing the model to life with accurate colors and textures.
Start with a high-quality primer. Primer not only provides a uniform surface for paint adhesion but also helps reveal any imperfections that need addressing before color application. For complex models, consider using an airbrush for smooth, even base coats, especially across large surfaces or intricate camouflage patterns. Airbrushing allows for thin, controlled layers, preventing loss of detail.
Detail painting, often done with fine brushes, adds the smaller elements that give a model character. This includes cockpits, instrument panels, figures, and small equipment. Reference images of the real subject are invaluable here to ensure historical accuracy. Decals, while sometimes challenging, add markings, stencils, and insignia, further enhancing realism. Use decal setting and softening solutions to help them conform to irregular surfaces and eliminate silvering.
Advanced Painting Techniques
- Pre-Shading and Post-Shading: Techniques used to create depth and variation in base colors by painting darker or lighter tones along panel lines or in specific areas.
- Masking Techniques: Utilize masking tape, liquid mask, or even specialized masking films for sharp lines and complex camouflage patterns.
- Oil Dot Weathering: Applying small dots of oil paint and blending them with a brush dampened with thinner to create subtle color variations and streaking effects.
The painting and detailing phase is where the model truly gains its soul. Through careful color application, intricate detailing, and the strategic use of decals, the model transforms from a mere representation into a compelling, realistic miniature.
Weathering and Patina: Adding Depth and History
Once the base paint and decals are applied, weathering begins. This is the process of simulating the effects of age, environment, and use on the model, adding a layer of realism and storytelling. For complex scale models, weathering can range from subtle dust and grime to heavy battle damage or extensive rust.
Washes are a fundamental weathering technique. By applying thinned paint or specialized enamel/oil washes into panel lines and recesses, you can enhance definition and create shadows. Excess wash is then carefully removed, leaving behind subtle staining. Filters, on the other hand, are very thin layers of highly diluted paint applied over broader areas to subtly alter the base color and unify the various paint layers.
Chipping and scratching effects simulate wear and tear. This can be achieved by carefully painting small chips with a fine brush or using techniques like the hairspray method, where a layer of hairspray is applied before the topcoat, allowing the topcoat to be chipped away with water to reveal the base color. Pigments, dry-brushed onto surfaces, are excellent for simulating dust, mud, and rust, especially on vehicle tracks, wheels, and lower hull areas.
Specialized Weathering Effects
- Streaking Effects: Use enamel or oil paints thinned with mineral spirits, applied as small dots and then dragged downwards with a clean brush for realistic rain marks or fluid leaks.
- Rust and Corrosion: Employ specialized rust pigments, texture paints, and even salt weathering techniques to create convincing corrosion effects on metal parts.
- Mud and Dirt Accumulation: Utilize texture paints, real dirt fixed with pigments, or custom mixes to build up realistic mud and dirt on vehicle undersides and wheels.
Weathering is where the model’s narrative truly comes alive. It tells a story of its existence, its battles, its journeys. This stage requires observation, artistic intuition, and a willingness to experiment to achieve truly convincing and impactful results.
Final Touches and Protection: The Masterpiece Seal
The final touches and protective layers are what truly seal your complex scale model as a masterpiece. This stage involves applying clear coats, adding delicate details, and ensuring the model is protected for display. Overlooking these steps can compromise the longevity and visual impact of your hard work.
A clear coat is essential for protecting your paintwork and decals. Depending on the desired finish, you can use a matte, satin, or gloss clear coat. Matte finishes are generally preferred for military vehicles and aircraft, while gloss finishes might be suitable for civilian cars or sci-fi models. Apply clear coats in thin, even layers, allowing each to dry thoroughly before the next. An airbrush is highly recommended for an even application without brush marks.
Beyond the clear coat, consider any last-minute details. This might include adding antennas made from stretched sprue or fine wire, attaching clear parts like canopies or windscreens with clear glue, or even adding tiny figures or accessories to a diorama base. These seemingly small additions can have a significant impact on the overall presentation.
Display and Preservation
- Display Cases: Protect your model from dust and accidental damage with a clear display case.
- Environmental Control: Store models away from direct sunlight, extreme temperatures, and high humidity, which can cause paint fading or warping.
- Gentle Cleaning: Use a soft brush or a can of compressed air for occasional dusting; avoid harsh chemicals or excessive wiping.
The final touches and protective measures are the culmination of your entire effort. They preserve the intricate details and vibrant finishes, ensuring your complex scale model remains a stunning masterpiece for years to come.
Showcasing Your Work: The Grand Reveal
After countless hours of meticulous work, the final step is to showcase your complex scale model. This isn’t just about placing it on a shelf; it’s about presenting it in a way that highlights its craftsmanship and tells its story. A well-presented model elevates it from a mere hobby item to a piece of art.
Consider creating a simple base or a small diorama. A base provides context and stability, grounding the model and drawing the viewer’s eye. Even a plain black or wooden base can significantly enhance the presentation. For more ambitious projects, a diorama can depict a scene, adding narrative and immersing the viewer further into the model’s world.
Photography is another crucial aspect of showcasing your work. Good lighting, a clean background, and multiple angles can capture the intricate details and weathering effects you meticulously applied. Share your work online on forums, social media, or dedicated model-building websites to connect with other enthusiasts and receive feedback. This engagement is a rewarding part of the hobby, fostering a sense of community and providing inspiration for future projects.
Effective Presentation Strategies
- Lighting: Use natural light or soft, diffused artificial light to avoid harsh shadows and highlight details.
- Backgrounds: A neutral, uncluttered background ensures the focus remains entirely on your model.
- Multiple Angles: Photograph your model from various perspectives, including close-ups of key details, to fully capture its complexity.
Showcasing your work is the celebratory conclusion to your modeling journey. It’s an opportunity to share your passion, inspire others, and appreciate the masterpiece you’ve created from a simple kit.
| Key Workflow Step | Brief Description |
|---|---|
| Kit Selection | Choosing a complex kit based on quality, scale, and aftermarket support. |
| Strategic Planning | Detailed review of instructions, dry-fitting, and tool preparation. |
| Precision Assembly | Meticulous joining of parts, seam removal, and sub-assembly integration. |
| Weathering & Patina | Applying effects like washes, pigments, and chipping to simulate age and wear. |
Frequently Asked Questions About Building Complex Scale Models
The most challenging aspect often lies in managing intricate sub-assemblies and achieving seamless integration of various materials like plastic, photo-etch, and resin. Precision alignment, delicate handling of small parts, and effective seam removal also pose significant hurdles, requiring patience and specialized techniques for a flawless finish.
Improving painting skills involves consistent practice, experimenting with different paint types (acrylic, enamel, lacquer), and mastering airbrush control. Learning techniques like pre-shading, post-shading, and masking, along with studying color theory and real-world references, will significantly enhance your ability to achieve realistic and nuanced finishes.
While not strictly necessary for every build, aftermarket parts like photo-etched details, resin upgrades, and metal barrels can dramatically enhance the realism and accuracy of a complex scale model. They often provide finer detail than injection-molded plastic, pushing a good build into the realm of a true masterpiece, especially for competitive modeling.
Key trends for 2026 include increased integration of 3D printing for custom parts, enhanced digital instructions with AR overlays, and a growing focus on environmental dioramas. There’s also a rise in highly modular kits and advanced weathering products that simplify complex effects, making high-level detailing more accessible to a broader audience.
Protecting your finished model involves applying a durable clear coat (matte, satin, or gloss) to seal the paint and decals. For long-term preservation, display your model in a dust-proof case, away from direct sunlight and extreme temperature fluctuations. Regular gentle dusting with a soft brush or compressed air will keep it pristine.
Conclusion
The journey from kit to masterpiece: a 7-step workflow for building complex scale models in 2026 is a testament to patience, skill, and an unwavering passion for detail. By diligently following each stage—from careful kit selection and strategic planning to precision assembly, artistic painting, realistic weathering, and thoughtful presentation—modelers can transform a collection of plastic parts into a breathtaking, museum-quality collectible. This comprehensive approach not only hones technical abilities but also cultivates an appreciation for the intricate stories these miniatures tell, ensuring that each completed model stands as a true work of art.


