Headlight Restoration: DIY Guide to Improve Visibility & Safety

Headlight restoration is a straightforward process that dramatically improves visibility and safety by removing cloudiness and yellowing from your car’s headlights, enhancing their brightness and ensuring safer driving conditions, especially at night.
Is your car’s headlight looking a little dull? Headlight restoration is a simple do-it-yourself project that can dramatically improve your vehicle’s visibility and safety, saving you money and enhancing your driving experience. This guide will walk you through the process.
Why headlight restoration is essential
Over time, headlights become clouded and yellowed, which significantly reduces their effectiveness. This isn’t just an aesthetic issue; it’s a safety concern that affects your ability to see and be seen.
The Impact of Cloudy Headlights
Cloudy headlights scatter light, reducing the beam’s intensity and range. This makes night driving more hazardous, especially in poorly lit areas or during inclement weather.
Safety First
Clear headlights improve visibility, allowing you to react faster to potential hazards. This is crucial for avoiding accidents and ensuring your safety and the safety of others on the road.
Headlight clarity isn’t just about looks; it’s a key factor in safe driving, particularly when visibility is poor. By restoring your headlights, you’re investing in your safety and that of other drivers.
Why you should restore your headlights:
- Improved Visibility: Enhances your ability to see clearly at night.
- Enhanced Safety: Reduces the risk of accidents due to poor visibility.
- Cost-Effective: More affordable than replacing the entire headlight unit.
- Aesthetic Appeal: Improves the overall look of your vehicle.
Restoring your headlights is not only vital for safety but also a cost-effective solution. Replacing the entire headlight assembly can be expensive, while restoration is a fraction of the cost.
Understanding headlight oxidation
Headlight cloudiness is primarily caused by oxidation. Understanding this process is key to effectively restoring your headlights.
What is oxidation?
Oxidation occurs when the plastic lens of the headlight is exposed to UV rays from the sun. Over time, this exposure degrades the plastic, causing it to become cloudy and yellow.
Environmental Factors
Besides UV rays, other environmental factors such as road debris, pollution, and chemicals can accelerate oxidation. These elements contribute to the breakdown of the plastic, reducing its clarity.
Environmental factors play a significant role in headlight oxidation. Protecting your headlights from these elements can help slow down the process and maintain clarity longer.
- UV Exposure: The primary cause of oxidation.
- Debris: Scratches the lens and accelerates clouding.
- Chemicals: Road salts and detergents can damage the plastic.
Knowing the factors that cause headlight oxidation allows you to take preventative measures. Regular cleaning and applying UV protectants can help maintain the clarity of your headlights.
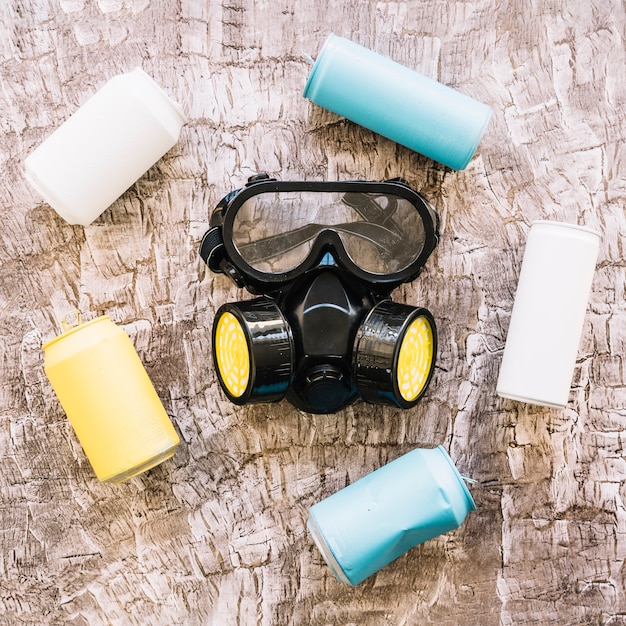
Materials Required for DIY Headlight Cleaning
Before starting the process, gather all the necessary materials. Having everything on hand will make the restoration process smoother and more efficient.
Essential Supplies
The basic supplies include sandpaper (various grits), masking tape, headlight cleaner, UV protectant, and microfiber cloths. These materials are readily available at most auto parts stores.
Choosing the Right Sandpaper
Use multiple grits of sandpaper, starting with a coarser grit (e.g., 400 grit) to remove the heavy oxidation, then moving to finer grits (e.g., 800, 1000, 2000 grit) to smooth the surface.
Selecting the right materials is crucial for effective headlight restoration. Investing in quality products ensures better results and longer-lasting clarity.
These are the materials you need:
- Sandpaper: Multiple grits (400, 800, 1000, 2000).
- Masking Tape: To protect surrounding paint.
- Headlight Cleaner: Specifically designed for headlight restoration.
- UV Protectant: To prevent future oxidation.
- Microfiber Cloths: For cleaning and polishing.
Having all the necessary materials organized before you start ensures an efficient and effective headlight restoration process. This preparation helps avoid interruptions and ensures a smooth execution.
Step-by-step Guide to Headlight Restoration
Follow these steps to restore your headlights effectively. Each step is crucial for achieving clear and bright headlights.
Preparation
Start by cleaning the headlights with soap and water to remove any dirt and debris. Then, use masking tape to protect the paint around the headlights.
Sanding the Headlights
Begin with the coarsest grit sandpaper (400 grit) and wet-sand the headlights in a back-and-forth motion. Apply even pressure and keep the sandpaper wet. Gradually move to finer grits, repeating the process until the surface is smooth.
Restoring headlights requires patience and attention to detail. Following each step carefully ensures the best possible results and long-lasting clarity.
Step-by-step instructions:
- Clean: Wash the headlights to remove dirt.
- Tape: Protect the surrounding paint with masking tape.
- Sand: Start with coarse grit and gradually move to finer grits.
- Polish: Apply headlight cleaner with a microfiber cloth.
- Protect: Finish with a UV protectant.
By following these steps, you can effectively restore your headlights, improving visibility and safety. Remember to take your time and apply even pressure during the sanding process.
Tips for achieving optimal results
To get the best results from your headlight restoration, consider these tips.
Wet Sanding
Always wet-sand the headlights to prevent the sandpaper from clogging and to reduce the risk of scratching the plastic. Keep the sandpaper and headlight surface lubricated with water.
Even Pressure
Apply even pressure while sanding to ensure uniform removal of oxidation. Avoid pressing too hard, which can create uneven surfaces.
Attention to detail is crucial for achieving optimal results in headlight restoration. These tips can help you avoid common mistakes and ensure your headlights look their best.
More tips to get the best results:
- Use Quality Products: Invest in high-quality cleaners and protectants.
- Follow Instructions: Read and follow the instructions on the product labels.
- Apply Evenly: Make sure to apply the protectant evenly for consistent results.
By following these tips, you can significantly improve the outcome of your headlight restoration, ensuring clearer, brighter, and safer headlights.
Maintaining restored headlights
After restoring your headlights, proper maintenance is necessary to prolong their clarity.
Regular Cleaning
Clean your headlights regularly with mild soap and water to remove dirt and debris. This prevents buildup that can accelerate oxidation.
Applying UV Protectant
Reapply UV protectant every few months to shield the plastic from harmful UV rays. This will help maintain the clarity and prevent yellowing.
Maintaining your headlights after restoration is just as important as the restoration process itself. Regular care will ensure they stay clear and effective for longer.
How to maintain your headlights:
- Clean Regularly: Wash with mild soap and water.
- Reapply Protectant: Apply UV protectant every few months.
- Park in Shade: Avoid prolonged exposure to direct sunlight.
By integrating these maintenance practices into your car care routine, you can ensure your headlights remain clear and effective, maintaining optimal visibility and safety.
| Key Aspect | Brief Description |
|---|---|
| 💡 Importance | Headlight restoration improves visibility and enhances driving safety, especially at night. |
| 🛠️ Materials | Essential supplies include sandpaper (various grits), masking tape, headlight cleaner, and UV protectant. |
| 🔧 Steps | Clean, tape, sand with multiple grits, polish, and protect with a UV coating. |
| 🛡️ Maintenance | Regular cleaning and reapplication of UV protectant are critical for longevity. |
Frequently Asked Questions
▼
It depends on the climate and driving conditions, but typically every 12-24 months. More frequent maintenance may be needed in areas with intense sun exposure.
▼
While some household products might offer temporary results, they are not designed for headlight plastic and may cause damage. Use products specifically made for headlights.
▼
Yes, sanding removes the oxidized layer of plastic that causes cloudiness. It’s essential for achieving clear and bright headlights.
▼
If the damage is severe, professional restoration or replacement might be needed. Check for deep cracks or internal damage.
▼
Regularly clean your headlights, apply UV protectant, and park your car in the shade whenever possible to minimize sun exposure.
Conclusion
By following these simple steps and tips, you can easily restore your headlights and maintain their clarity, ensuring safer driving conditions. Headlight restoration is a worthwhile DIY project that improves visibility and the overall appearance of your vehicle.


